Online banking
This section focuses on creating a convenient way to access your vault in a read-only fashion.
After following this guide, you will be able to:
- view your balance,
- generate receive addresses,
- create transactions to sign.
We will also discuss how we can use the coldcard to sign transactions as and when we need to make withdrawals.
Table of contents
You will need
- MicroSD card
- MicroSD card reader for your mobile or Macbook
- Your mobile phone or a Macbook (Windows and Linux are not currently supported)
Instructions
Exporting an XPUB key
The first thing we will need to do, is to create a file that gives us read-only access to our wallet. This file contains a key called XPUB (extended public key).
The file we will create is designed for Electrum, a desktop bitcoin wallet application, however the application we will be using, BlueWallet, can use this same file. The ColdCard will also give us an option of what address type we wish to monitor; the latest address type available at the time of writing is called “Native Segwit”.
The most popular wallets use the Native Segwit address type as default, and the older address types are presented for the sake of backwards compatibility. If you need to send bitcoin to an older address type for any reason, you can follow this guide and choose the appropriate address type to set up another watch only wallet.
Think of it as setting up a Revolut, a Monzo, and a Paypal account for their unique features but with a single signing device behind them.
Turn on and log into the coldcard. Once logged in, we can insert our microSD card into the port on the side of the device.
Select Advanced, MicroSD Card, Export Wallet, and then Electrum Wallet. You will be presented a disclaimer about the feature, press OK and then finally choose Native Segwit.
The ColdCard will write a new file to the MicroSD card and show you the name of the file; this is usually new-wallet.json.
You can now power off your ColdCard.
Download BlueWallet
BlueWallet is available for iPhone and Android phones and tablets, as well as for Macbooks and Mac computers (Windows and Linux PCs are not yet supported).
You can find the mobile application at https://bluewallet.io/, and the desktop wallet here: https://bluewallet.io/desktop-bitcoin-wallet/.
Once downloaded and installed, it is a good idea to explore tha application settings and add password protection, found in the security section; but that is purely optional.
The rest of this guide is based around using the application on an android phone. The user interface may be slightly different on different devices.
Creating a watch-only wallet
Remove the MicroSD card from the ColdCard and insert it into your MicroSD adapter for your mobile or desktop device.
Launch BlueWallet and log in if needed. Next click on the + or the Add now button, click on import wallet, and then Scan or import a file. On a mobile device, the application will activate the camera, but near the bottom will be two buttons, one of which will allow you to choose a file.
Click on the file icon, find your new-wallet.json file and select it. BlueWallet will read this file and create your wallet for you. You should see an empty balance for now, as we haven’t yet used the wallet.
Checking the fingerprint
In the previous guide, we wrote down our identity fingerprint. To verify that we have set up our wallet properly, BlueWallet allows us to see the same fingerprint.
Make sure we are focused on the wallet; you will see a receive and a send button near the bottom. Tap on the three dots in the top right corner and you should be taken to a page which shows a few bits of information including a master fingerprint. This should match the fingerprint from the ColdCard.
You can also modify the name of the wallet here, think of it as a name for your new bank savings account.
To recap
- Boot and log into your ColdCard
- Insert your MicroSD card
- Select
Advanced>MicroSD Card>Export Wallet>Electrum Wallet - After acknowledging the message, choose the
Native Segwitaddress type - Eject the MicroSD card and power off the ColdCard
- Install BlueWallet
- Click the button to “add a new wallet”
- Choose to import an existing wallet
- Import the json file from the MicroSD card
- Check the fingerprint
Congratulations!
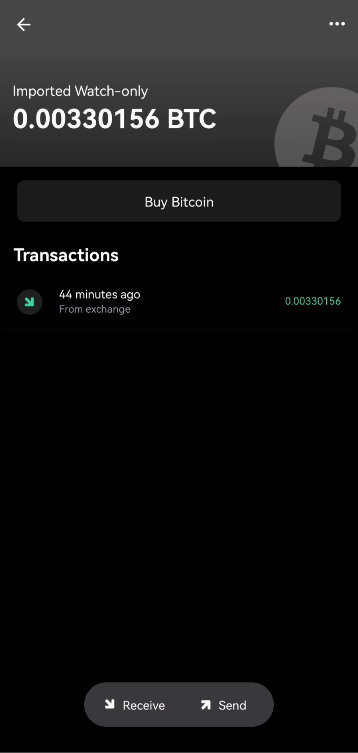
At this point, you have a fully functioning Bitcoin watch only wallet:
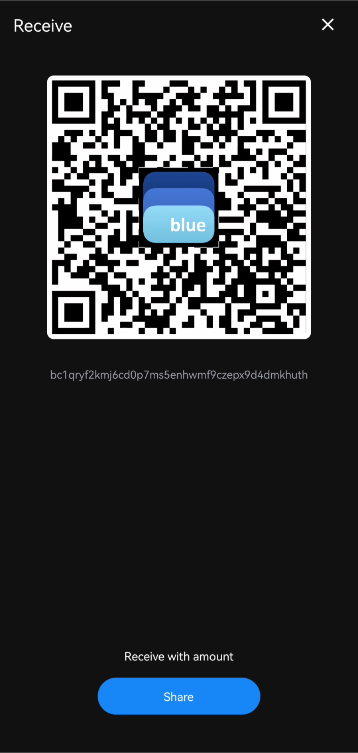
- You can generate receive addresses and accept payment,
- you can view your balance at any time,
- and you can make a request to send bitcoin to another address.

Spending your bitcoin
A vault is not your typical spending wallet; consider it to be your savings account, while hot wallets act as your current account.
Typically you will use your vault to send money to your spending wallets over the weekend or as and when you need to. You will also use it to deposit any money that you don’t plan to spend from your hot wallet.
When you are ready to transfer bitcoin to a hot wallet, you can start by asking the hot wallet for a receive address. If your BlueWallet is on the same device as the hot wallet, you can copy the receive address to clipboard; different wallets will have different ways to do this, but often it just takes tapping on the qr code it presents.
Next we must connect a MicroSD card to the device that we are running BlueWallet on. It can be the same MicroSD card we used before, or a different one, it doesn’t matter.
Open BlueWallet, focus on the wallet and then hit the send button. Choose the amount you wish to send by tapping on the amount at the top and entering the amount using the keyboard; if you wish to send the total amount, you can do so by clicking on the total shown just above the keyboard.
If the hot wallet is on a separate device, you can click the scan button to load the receive address through the camera using the QR Code presented by the hot wallet. If you are using the same device, then you can paste the address into the Address field.
After pasting, double check the first and last 6 characters are identical; this is similar to checking that you typed in the account number correctly when online banking, it ensures that we are not accidentally sending to the wrong place and that if there is malware on our device, that it is not tricking us into sending money to the wrong place.
Just above the Next button, you should see the fee, you can modify the fee by clicking on it. If you are not in a rush and can wait overnight, it may be enconomical to set the fee to 1 sat/vbyte.
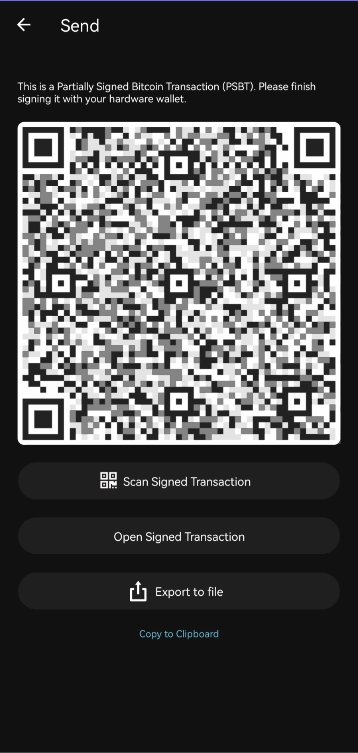
Finally, click the Next button. You will see an animated QR Code, as well as some buttons. Click Export to file and then save the file to your MicroSD card.
Boot your ColdCard and log in. Insert the MicroSD card and select Ready to sign.
The ColdCard will show you some details of the transaction and ask you to approve the transaction. After approving, the ColdCard will sign the transaction and we can bring the MicroSD card back to our BlueWallet device.
On BlueWallet, click on the Open Signed Transaction button and load in the new file ending in -signed.psbt found on the MicroSD card.
Finally, hit the Send Now button to send out the transaction to the Bitcoin network. Once the transaction has been sent, it is safe to delete all .psbt and .txn files on the MicroSD card. Deleting these files ensures that we have a clean slate for the next transaction we need to sign.
Summary
The signing process can be a little involved, but after the first attempt, it will feel easy and natural. Remember that the wallet we are creating is designed to hold a lot of money; it should be designed to be a slow and considerate process to spend from this wallet.
Being able to view your balance and receive without ever touching your ColdCard means that we can keep the ColdCard hidden away in a secure place which will only serve towards improving the security of our wallet.